"Did Aunt Carol respond yet? What about the Smiths? How many confirmed yes to the rehearsal dinner?" If that sounds familiar, you are already in data management mode — and it only gets more demanding from here.
A 150-person wedding generates roughly 300-400 data points: attendance decisions, meal choices, dietary restrictions, plus-one names, song requests, shuttle needs, seating preferences. Those data points need to be collected cleanly, tracked accurately, and — most importantly — exported in the right format for each vendor who needs them.
This guide focuses on what most RSVP articles skip: the post-close workflow. Once your RSVP deadline passes, what do you actually do with the data? Which vendors need what, in what format, and when? How do you protect guest data you have collected? And what does QR check-in at the reception actually look like in practice? This is the operational guide to getting from "RSVPs closed" to "wedding day ready."
Reading is one thing — trying is another. The phone on the rightbelow is a live, working RSVP: tap the invite exactly like your guests would.
Why You Need a Real RSVP Tracking System
Paper RSVPs trickle in over 6-8 weeks, handwriting is sometimes illegible, and they provide no dietary data structure you can actually use. Verbal confirmations get forgotten or miscounted. Group chat replies contain no searchable data — when your caterer asks for a final headcount at 9 PM two weeks before the wedding, "I'll be there!" in a WhatsApp thread from March is useless. A proper tracking system centralizes all of that into one place, in a format you can actually act on.
Instant Updates
See responses the second guests submit. No waiting for mail delivery or manually entering data.
Auto Calculations
Total headcount, meal counts, and dietary summaries update automatically. No spreadsheet formulas at 2 AM.
Automated Reminders
The system nudges non-responders via email or WhatsApp. You don't have to be the bad guy.
Clean Exports
Send your caterer, florist, and venue a clean spreadsheet with exactly the data they need.
RSVP Tracking Tools Compared (2026)
Not every couple needs the same tool. Here's an honest comparison of the most common approaches to tracking RSVPs, from low-tech to purpose-built.
| Feature | Spreadsheet (Google Sheets) | The Knot / Zola | QuikRSVP |
|---|---|---|---|
| Price | Free | Free (basic) | Free (basic) |
| Real-time updates | Manual entry | Yes | Yes |
| Automated reminders | No | Email only | Email + WhatsApp + SMS |
| WhatsApp delivery | No | No | Yes (SMS fallback for US bulk campaigns) |
| Multilingual forms | DIY | English only | 7 languages |
| Custom form fields | Unlimited (manual) | Limited | Unlimited |
| QR code check-in | No | No | Yes (with seating) |
| Export to Excel/CSV | Native | Yes | Yes |
| Multiple events | Multiple sheets | Yes | Yes |
| Best for | Tiny weddings (<30 guests) | US-based, English-speaking couples | Multilingual, international, or WhatsApp-heavy guest lists |
The bottom line: Spreadsheets work for very small weddings where you're manually entering everything anyway. The Knot and Zola are solid if your guests are all English-speaking and you're fine with email-only communication. QuikRSVP fills the gap for couples with bilingual families, international guests, or anyone who primarily communicates via WhatsApp.
One tool deliberately missing from this list is Paperless Post — it's built for card design, not RSVP tracking, and charges per card. If you're weighing it for guest management, our Paperless Post alternatives guide compares the platforms that do both.
What Your RSVP Dashboard Must Show
Whatever tool you choose, these are the data points your dashboard needs to surface clearly. If your tracker cannot show you these things without exporting to a spreadsheet, it is not doing its job.
1. The Three Core Numbers (Updated in Real Time)
- Attending: Total confirmed guest count including all plus-ones. This is the single number your caterer, venue, and rental company all need. It must include plus-ones as separate individuals, not "X guests + Y plus-ones."
- Declined: Who said no. This list matters if you have a B-list — every decline creates a potential invitation slot for a waitlisted guest.
- Pending: Who has not responded. This is your active follow-up list. It should reach zero by your RSVP deadline. Any platform that cannot show you the pending list by name is not usable for real follow-up management.
2. Meal Choice Summary with Individual Dietary Flags
You need two views simultaneously: an aggregate summary (78 chicken, 52 fish, 18 vegetarian, 12 kids) for your caterer's production planning, and individual flagged records (Sarah Chen: vegetarian + celiac; David Levi: halal protein needed) for the kitchen and serving staff. These are different data needs and require different views — make sure your dashboard supports both, not just one.
3. Named Plus-One Records
"John Smith + 1" is insufficient data for any wedding planning purpose beyond a headcount. Your dashboard must capture the plus-one's full name (for place cards), their own meal choice (for the caterer), and any dietary restrictions (for the kitchen). Treating a plus-one as a number rather than a named person creates problems at every downstream step: seating chart, place cards, caterer export, and name tent.
4. Custom Field Responses, Filterable and Exportable
Song requests, shuttle needs, hotel preferences, "how do you know the couple" — whatever you collected via custom fields should be visible per guest and filterable as a standalone export. If you have to open 150 individual guest records to compile a song request list, your dashboard is not working for you. Filter to "guests with song requests" and export that column directly.
5. Response Velocity (When Are Responses Coming In?)
A response-over-time view tells you whether you are on track or need to accelerate reminders. A general pattern: if you sent 150 invitations and have fewer than 60 responses at the two-week mark, send your first reminder now, not at the one-week mark. If you are at 130 responses with three weeks to go, you can wait for the automated reminder to catch the remainder. Response velocity helps you manage follow-up timing rather than guessing.
See Your RSVPs in Real-Time
Build your RSVP form and get instant access to a live tracking dashboard with all of the above.
How to Chase Non-Responders (Without Being Annoying)
Here's the uncomfortable truth: roughly 20-30% of your guests won't respond on time, even with a clear deadline. It's not malice — it's life. Here's a three-stage follow-up system that works.
Stage 1: Automated Gentle Reminder (2 Weeks Before Deadline)
Set up an automated message that goes out to anyone who hasn't responded. Keep it warm and short:
"Hi [Name]! We're finalizing numbers for our wedding on [date] and we'd love to know if you can make it. It takes 30 seconds to RSVP: [link]. Please let us know by [deadline]!"
With QuikRSVP, this reminder can go out via email or WhatsApp automatically. You set it once and forget it.
Stage 2: Personal Follow-Up (1 Week Before Deadline)
For anyone who still hasn't responded after the automated reminder, a personal text or WhatsApp message works best. Keep it casual and zero-pressure:
"Hey! I know things get busy, but we need final headcount by Friday. Can you let me know if you'll make it? No worries either way!"
This personal touch has a much higher response rate than a third automated message. People respond to people.
Stage 3: Final Call (3-5 Days Before Deadline)
For the last holdouts, a direct phone call or voice message is appropriate. At this point you need the information for vendor counts, so being direct is perfectly acceptable:
"Hi [Name], I need to give our caterer final numbers by tomorrow. Are you and [partner] able to join us on [date]? Just need a quick yes or no."
When to Assume "No"
If someone hasn't responded after three touchpoints (automated reminder + personal text + phone call), assume they're not coming and don't count them in your headcount. If they show up anyway, most caterers build in a 5% buffer for exactly this scenario.
Vendor Export Templates: What Each Vendor Actually Needs
Your caterer, venue coordinator, DJ, photographer, transportation company, and calligrapher all need different slices of your guest data — and most of them need it in a specific format. Sending everyone the same 200-row full export with every custom field wastes their time and buries the information they actually need. Export targeted, clean data for each vendor.
Below are the exact data fields each vendor typically needs, with copy-paste column headers you can use when creating filtered exports.
Caterer Export
This is the most data-intensive export you will produce. Caterers need it 7-10 days before the wedding to finalize quantities, source ingredients, and prep special meals. Send it in Excel or CSV.
| Column Headers to Include | Notes |
|---|---|
| Guest Name (First Last) | Full legal-style name, not nicknames |
| Meal Choice | Chicken / Fish / Vegetarian / Kids' Meal / etc. |
| Dietary Restrictions | Raw open-text field — do not standardize, share verbatim |
| Table Number | Once seating is finalized |
| Adult or Child | For per-head pricing and kids' portion sizes |
Also send a separate summary row: "Total: 148 adults, 12 children. Meal totals: 78 chicken, 52 fish, 18 vegetarian, 12 kids' meals. Dietary flags: 4 kosher, 3 nut allergy, 2 celiac, 1 halal, 1 vegan (no dairy or eggs). Full restrictions in the main tab."
Venue / Rental Company Export
Send 7-10 days before. They need one number: total confirmed guests. If you have table assignments, send those too.
- Total confirmed attendance count
- Table count and configuration (if you've done seating assignments)
- Any accessibility requirements (mobility aids, wheelchair access) — from your RSVP form if you asked
DJ / Band Export
Send 2-3 weeks before. They need song requests and any special moments information.
Song requests from guests: [list from RSVP form]
Do-not-play list: [songs or genres to avoid — set this as a custom field on your RSVP form if it matters to you]
First dance: [Song, Artist]
Parent dances: [Songs]
Guests' language preferences: [note if significant non-English-speaking groups are attending — the DJ may want to vary selections]
Total attendance: [number] including [X] children
Photographer / Videographer Export
Send 1-2 weeks before. They need the must-have shot list and key people to photograph.
- Named family groups for formal portraits (parents, grandparents, wedding party)
- Any guests who should not be photographed (ask as a custom RSVP field: "Do you have any photo preferences we should know about?")
- Total guest count for coverage planning
- Table layout if doing candid receptions shots
Calligrapher / Place Card Printer Export
Send 3-4 weeks before — this vendor needs the most lead time. Send a sorted Excel file with exactly two columns:
Column A: Display Name — exactly as it should appear on the card. "Dr. and Mrs. Cohen" not "Aaron and Linda Cohen" if that's how they should be addressed.
Column B: Table Number — the table assignment. Sort by table number ascending to make typesetting easier.
Proofread this list twice before sending. Spelling errors on place cards cannot be corrected the morning of the wedding. Export from your RSVP form, compare to your original guest list, and have a second person check every name.
Transportation Company Export
Send 1-2 weeks before. Filter your guest list to only those who indicated they need shuttle service.
- Total shuttle riders (both directions)
- Pickup hotel(s) and room blocks
- Any guests with accessibility needs
- Approximate split: ceremony-to-reception riders vs. hotel-to-ceremony riders
Always Send a Summary Row, Not Just Raw Data
Every vendor export should include a summary at the top — total count, key subtotals, and any special flags. Vendors need to act quickly on your data; a summary prevents them from having to count rows manually and reduces the chance of miscommunication about critical numbers like dietary restriction counts.
Tracking RSVPs for Multiple Events
Modern weddings often span multiple events: rehearsal dinner Friday night, ceremony and reception Saturday, farewell brunch Sunday morning. Some couples also have separate engagement parties, welcome drinks, or after-parties. Here's how to manage RSVPs across all of them.
Option 1: One Form with Multiple Sections
The simplest approach. Your RSVP form asks about all events at once:
- "Will you attend the rehearsal dinner on Friday?" (Yes / No / Not Invited)
- "Will you attend the ceremony and reception on Saturday?" (Yes / No)
- "Will you join us for brunch on Sunday?" (Yes / No)
This is easiest for guests because they only fill out one form. Your dashboard then shows separate headcounts per event.
Option 2: Separate Forms Per Event
Better when different guest lists are invited to different events (e.g., only wedding party at the rehearsal dinner). Each event gets its own RSVP link, and you can send targeted invitations.
Option 3: Progressive RSVPs
Send the main wedding RSVP first. After someone confirms, follow up with an invitation to the secondary events. This avoids overwhelming guests with too many questions upfront.
Pro Tip: Whichever option you choose, make sure your tracking tool shows you per-event headcounts. Your rehearsal dinner venue needs a different number than your reception venue, and your Sunday brunch caterer needs yet another count.
When to Close Your RSVP Form — and What to Display After
Closing the RSVP form is not just about locking in numbers for vendors. It is about creating a clear boundary that allows you to stop managing incoming data and start acting on the data you have. Here is how to time it correctly and what to show late guests who try to respond after the deadline.
RSVP Deadline Timeline (Domestic Guests)
- 8-10 weeks before wedding: Send invitations — digital or paper, with a clear specific deadline date
- 4-5 weeks before wedding: RSVP deadline (for domestic guests; international guests should have an earlier deadline)
- 3 weeks before: Automated reminder to all non-responders via your RSVP platform
- 2 weeks before: Personal text or WhatsApp to remaining non-responders — short, warm, and direct
- 10-14 days before: Close the form. Anyone still pending is a "no" for planning purposes
- 7-10 days before: Submit final counts and exports to caterer, venue, calligrapher, and transportation
- 3-5 days before: Submit final count and seating to DJ/Band and photographer
What to Display on a Closed RSVP Form
When you close your form, do not show a blank 404 page. Configure a post-close message that handles late responders gracefully. Effective post-close message:
"Our RSVP form is now closed as we finalize our plans. If you still need to respond, please text [Name] at [Phone Number] or email [Address]. We hope to see you there!"
This converts a dead end into a usable contact point. Guests who genuinely missed the deadline have a way to reach you. Guests who are not invited but find the link see a polite closed message rather than an empty form they might try to submit.
How to Handle Responses After You've Closed
After close, any new confirmations or cancellations need to be managed manually. The practical protocol:
- Late "yes": Check with your caterer whether their buffer accommodates one more. Most caterers plan for 3-5% over their confirmed count specifically for this. If yes, add them manually and update your seating chart. If your caterer cannot accommodate, be honest with the guest.
- Late "no" (cancellation): Remove from headcount immediately. If you are below your caterer's minimum guarantee, you may still owe for that meal — check your contract. Update the seating chart and notify your venue coordinator.
- No response at all: After three follow-up attempts (automated reminder, personal message, phone/voice), count them as a "no" and plan accordingly. If they show up on the day, most caterers can add a plate with advance notice, but you are under no obligation to hold a seat indefinitely.
The Biggest Tracking Mistakes (And the Specific Cost of Each)
Common Pitfalls and Their Real Consequences
- Not collecting plus-one names: "John Smith + guest" gives you no data for a place card, no name for the seating chart, and no meal assignment for the caterer. Result: "Guest" on a place card, or an awkward phone call to John three days before the wedding. Your RSVP form must ask for the plus-one's full name as a required field when the guest confirms a plus-one.
- Using a dropdown for dietary restrictions instead of an open text field: "Vegetarian / Vegan / Gluten-Free" as checkboxes sounds organized, but it misses the guest who is "vegetarian but will eat fish if that's all there is" or "celiac — not just gluten-free, full cross-contamination allergy." An open text field captures nuance. Give guests the free-form field and let them tell you what you need to know.
- Not setting a specific RSVP deadline: "Please respond by mid-May" produces responses scattered from April through June. "Please respond by May 15th at midnight" produces a response cluster you can actually plan around. Specific dates also give you grounds for a firm follow-up message that doesn't feel arbitrary.
- Tracking across multiple systems: Responses in a spreadsheet, some in a wedding website, some in your notes app, some in a group chat. When your caterer needs a final count at 6 PM on a Thursday, you need one source of truth — not four tabs open on your laptop. Pick one system and put everything there.
- Not backing up your data before the wedding week: Export your complete guest list to a local spreadsheet at least once in the week before the wedding. If your RSVP platform has any access issue (internet at the venue, platform downtime, billing issue), you have the complete data locally. This takes 60 seconds and could save your wedding day.
- Using a desktop-only tool during the final week: Last-minute changes happen at the venue, at the rehearsal dinner, at the hotel lobby. Your tracking tool needs to work on your phone. If you cannot update a guest's meal choice or add a surprise plus-one from a mobile device, you are back to sticky notes.
The Post-Close Workflow: What to Do After RSVPs Close
Your RSVP deadline is not the end of the process — it is the beginning of the final planning phase. The 2-3 weeks between close and wedding day are when data management actually matters most. Here is the complete post-close workflow.
Step 1: Audit Your Responses (Day 1-2 After Close)
Before doing anything with the data, spend an hour reviewing it for errors. Look for:
- Duplicate responses: Some guests submit twice (once by mistake, once with corrections). Keep the most recent.
- Missing plus-one names: "Guest" is not a name for a place card. Follow up individually with any guest who confirmed a plus-one but didn't provide a name.
- Ambiguous dietary entries: "No meat but fish is fine" means pescatarian. "Allergic to everything" needs a follow-up call. Flag any dietary response that is unclear and contact those guests directly before sending data to your caterer.
- Name spelling variations: "Catherine" vs. "Kathryn" vs. "Katherine" — check against your original invitation list to ensure names on your export match how guests expect to see them on place cards.
Step 2: Finalize Your Seating Chart (Days 3-7 After Close)
With confirmed names and meal choices in hand, assign guests to tables. Good RSVP tools allow drag-and-drop seating with dietary restriction flags visible per seat. QuikRSVP's seating feature supports keep-together and keep-apart rules, auto-assign by relationship group, and shows dietary flags per table view. This is also where custom field responses like "I'd prefer not to sit near the dance floor" become useful — they are only actionable if you collected them and can see them alongside the seating layout.
Send your seating chart to the venue coordinator and calligrapher immediately after finalizing it — calligraphers in particular need maximum lead time.
Step 3: Send Vendor Exports in the Right Order (7-10 Days Before)
Send vendor exports in priority order based on who has the longest lead time after receiving data:
- Calligrapher / place card printer: Send 3-4 weeks before — highest lead time of any vendor. A proofread sorted list of "display name, table number."
- DJ / Band: Send 2-3 weeks before. Song request list plus special moments information.
- Caterer: Send 7-10 days before. Full dietary export with summary row. Confirm you've flagged every allergy individually.
- Venue / rental company: Send 7-10 days before. Final headcount plus table configuration.
- Transportation: Send 7-10 days before. Filtered list of shuttle riders, pickup hotel, accessibility needs.
- Photographer: Send 1-2 weeks before. Family portrait groups, must-have shots, any photo-preference flags from RSVP form.
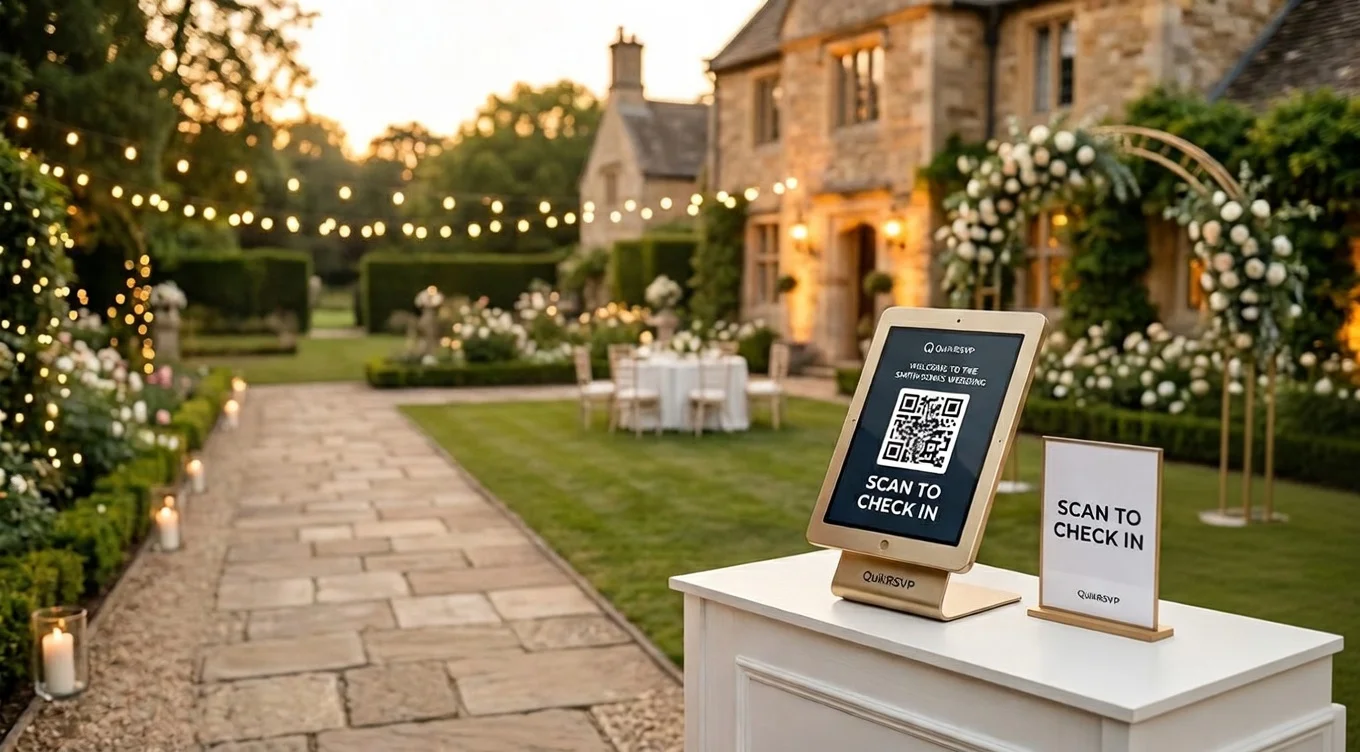
Step 4: Set Up QR Code Check-In
If your RSVP tool supports it, enable QR code check-in for the reception. There are two modes: personal QR (each confirmed guest receives their own unique code ahead of the event — they scan on arrival and your dashboard marks them as checked in) and Master QR (a single code posted at the venue entrance that guests scan themselves, entering their own name — zero staff required). The personal QR option links directly to your seating data so guests can see their table assignment on the spot. Your coordinator dashboard updates in real time, showing exactly who has arrived when you are ready to start the evening. (Full QR check-in guide here.)
Step 5: Build Your Last-Minute Change Protocol
Someone will cancel the week of. Someone else will request to bring an unexpected guest. Having a clear protocol prevents these from becoming crises:
- Caterer buffer: Ask your caterer for the latest they can accept a headcount change. Most can accommodate ±5% changes up to 72 hours before the event. Confirm this number explicitly.
- Add-on guests: Decide in advance whether you will accommodate late additions at all, and what your maximum is. "One extra" is usually fine; "five extra" may not be.
- Cancellations: For cancellations within 48 hours, you may still owe the caterer for that meal. Know your contract before agreeing to release a seat.
- Keep your tracking tool on your phone: Final changes happen at the venue. You should be able to update attendance, add a seat, or mark a dietary flag from your phone while standing at the reception entrance.
Guest Data Privacy: What You Need to Know
RSVP forms collect personal data: full names, email addresses, phone numbers, dietary restrictions (which can reveal health conditions or religious practices), and sometimes accommodation or travel details. As the person collecting this data, you have responsibilities — both legal and ethical.
What Data You're Collecting and Why It Matters
Dietary restrictions and food allergy information is considered sensitive personal data in many jurisdictions, including under GDPR in the EU/UK. If you have guests from Europe, you are technically collecting EU-resident personal data, which triggers GDPR considerations. In practice, most consulates and regulators take a practical view of personal wedding RSVP data — but you should be aware of what you hold.
Minimum Privacy Standards for Wedding RSVP Data
- Only share data with vendors who need it. Your caterer needs dietary restrictions. Your DJ does not. Your calligrapher needs guest names and table numbers. They do not need phone numbers or email addresses. Share filtered exports, not full dumps.
- Do not store guest data indefinitely. After your wedding, your RSVP data has served its purpose. Delete or anonymize the export within a reasonable period — 6-12 months is a common benchmark.
- Secure your exports. If you email a spreadsheet of 150 guest names, meal choices, and dietary restrictions to your caterer, consider whether a password-protected file is appropriate. For most small weddings this is over-engineering, but for couples with high-profile guests or sensitive attendance information, it matters.
- Don't share your guest list publicly. RSVP export spreadsheets should never be shared in a public Google Sheet, posted in a group chat with non-vendors, or left in an accessible shared drive.
- Understand what your RSVP platform stores. QuikRSVP's data is stored securely in Firestore with access controls. Guest responses belong to you as the form owner. Review any platform's data retention policy before committing, particularly for dietary and health-adjacent data.
Allergy Data Deserves Special Care
A guest's nut allergy or celiac condition is health information. It should be shared with your caterer clearly and specifically — but it should not be on a shared whiteboard at the venue, printed casually in a program, or shared beyond those who need it for food safety purposes. Treat it with the same care you would treat any health information.
From Collected to Exported: Track RSVPs the Smart Way
Build your RSVP form in minutes. Get a real-time dashboard, automated reminders via WhatsApp and email, vendor-ready exports, and QR check-in — all in one tool.