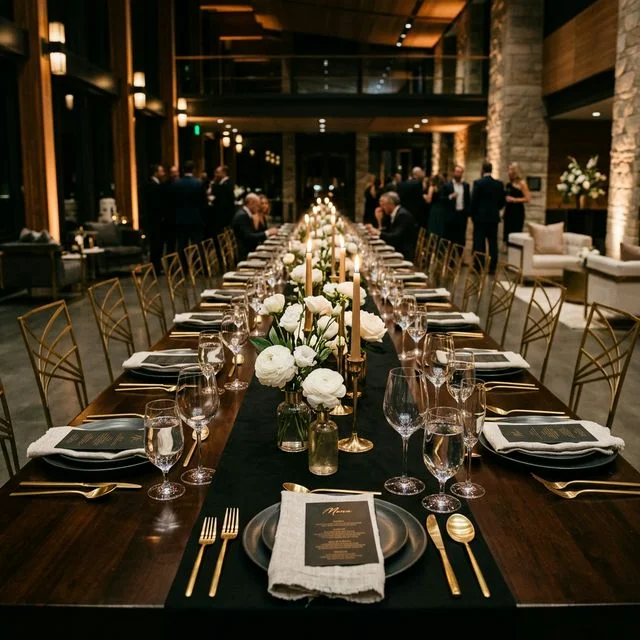
It's 6:15 PM at a 160-person wedding. Cocktail hour is in full swing. The couple hasn't had to worry about check-in once — because 140 guests self-checked by scanning a single sign at the entrance, and the 20 who arrived without smartphones were handled in seconds by one greeter with a tablet. No lines. No clipboards. No one reading out names to a flustered volunteer.
QR check-in isn't a gimmick. It's the fastest, most reliable way to get guests into an event, confirm their table, and give you an accurate live headcount. This guide covers the two modes (personal codes vs. Master QR), exact print specifications, accessibility plans, contingency workflows, and a step-by-step setup walkthrough.
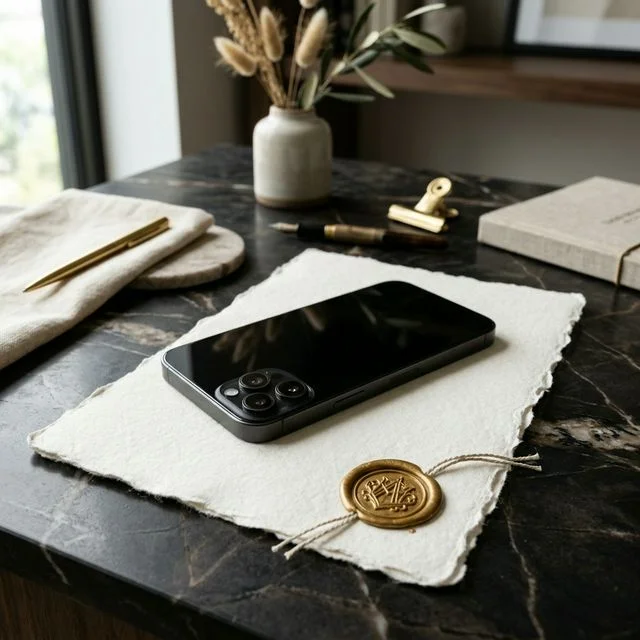
Reading is one thing — trying is another. The phone on the rightbelow is a live, working RSVP: tap the invite exactly like your guests would.
Two Modes of QR Check-In: Which One Is Right for Your Event?
Before anything else, decide which check-in mode you're running. They serve different events and require different setup paths.
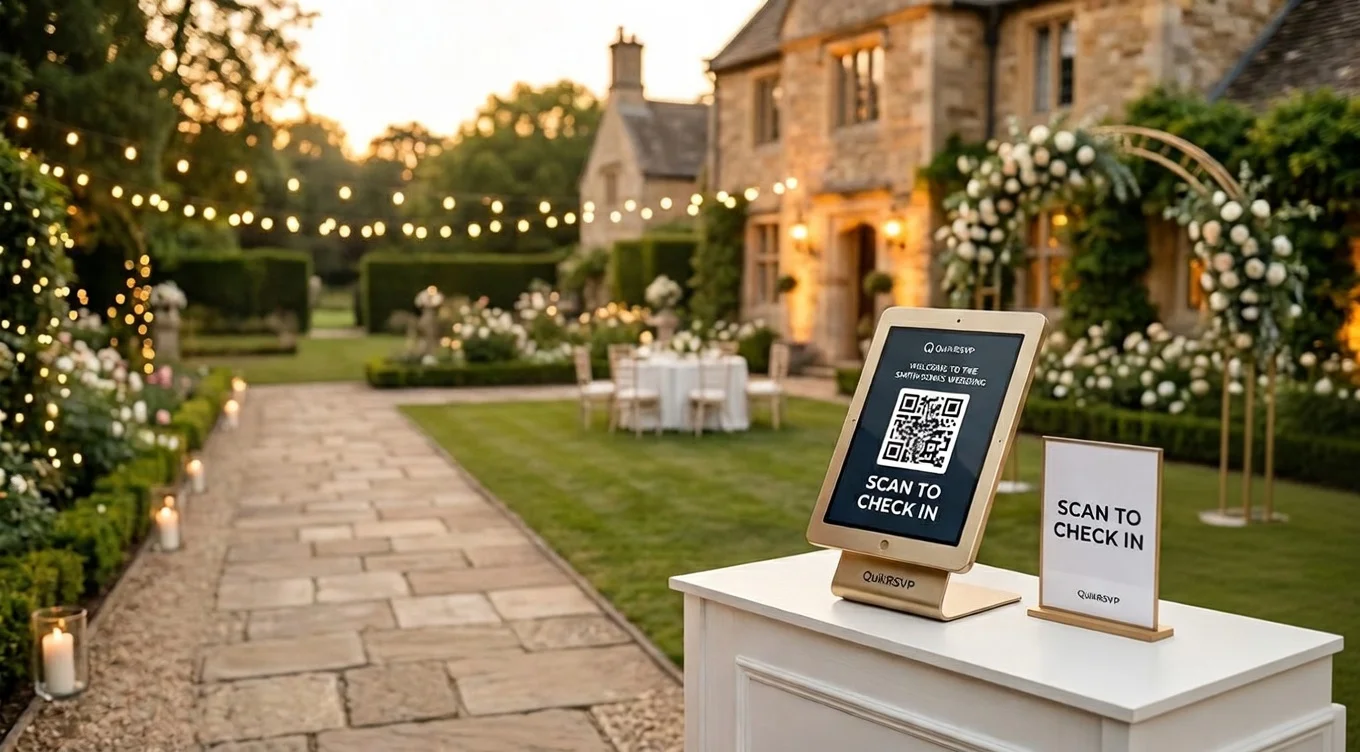
Master QR Sign
One QR code on a sign at the entrance. Guests scan it, type their name, and see their table. Zero pre-distribution needed.
Best for: Weddings, galas, fundraisers, any event where guests arrive at a single entrance.
Personal Guest QR Codes
Each guest receives their own unique QR code in a confirmation message. They scan it, and their info appears instantly — no name entry required.
Best for: Conferences, VIP events, multi-session formats where speed and security matter.
The Master QR is the default for most events because it's simpler — one sign, zero prep per guest. Personal codes add a layer of security and eliminate the name-lookup step, which matters when you have 500 conference attendees funneling through a lobby in 20 minutes.
QR Code Check-In vs. Traditional Guest Lists: Speed Comparison
At 150 guests arriving in a 30-minute window, the method you choose has a major impact on how the arrival experience feels.
| Check-In Method | Time Per Guest | 150 Guests (Est.) | Staff Needed |
|---|---|---|---|
| Paper list (alphabetical) | 45-90 seconds | 60-90 min | 2-3 volunteers |
| Printed escort cards (table) | 30-60 seconds | 40-60 min | 0 (self-serve, but messy) |
| Tablet with search app | 15-25 seconds | 20-30 min | 1-2 staff |
| Master QR scan (self-serve) | 5-10 seconds | 12-20 min | 0-1 greeter |
| Personal QR code (pre-sent) | 2-3 seconds | 5-8 min | 0 |
At a 300-person corporate gala with a 45-minute arrival window, the difference between a paper list and a QR sign isn't marginal — it's the difference between a visible queue at the door and guests who walk straight to their tables. Managing a large or internationally distributed guest list adds further complexity; see the guide on managing international wedding guests for handling time zones, language preferences, and travel logistics at scale.
Step-by-Step: Setting Up Master QR Check-In with QuikRSVP
Step 1: Build Your RSVP Form and Collect Responses
Your check-in system pulls directly from RSVP data. Whatever guests provide when they RSVP is what they'll see when they scan. Build your form first — guest names, attendance, meal choices, plus-one details, any custom fields. (Need help? Read the full RSVP form guide.)
Step 2: Assign Guests to Tables
Once RSVPs close, open the seating tool in your dashboard:
- Create tables: Add them by name or number (Table 1, Head Table, VIP Lounge, Kids' Table). Set capacity per table.
- Drag and drop: Assign guests from your confirmed list into table slots. The tool shows you who RSVPed together so you can seat groups.
- Set keep-together / keep-apart rules: Mark couples or families to stay at the same table, or flag conflicts to separate automatically.
- Auto-assign: Let the system fill remaining seats based on relationship groups, then adjust as needed.
Table changes sync to the QR system in real time, so last-minute swaps on the morning of the event are reflected immediately when guests scan.
Step 3: Enable QR Check-In and Download Your Master QR
In your event dashboard, enable QR Check-In. The system generates two assets:
- Master QR code: A single code that opens a name-lookup page. This is what you print on your welcome sign.
- Individual guest QR codes: A unique code per guest, available for download or bulk send via WhatsApp or email. When scanned, shows that guest's info directly — no name entry.
Download the Master QR image (PNG, high resolution). This is what you'll drop into your sign design.
Step 4: Design and Print Your Sign
See the full print specifications in the section below. The short version: 18x24 inch sign, QR code at 5x5 inches minimum, printed at 300 DPI on foam board or mounted cardstock.
Step 5: Test Everything the Day Before
This is not optional. Before the event:
- Print the sign and scan it with an iPhone and an Android device
- Search for your own name and confirm the correct table appears
- Test on the venue's WiFi and on mobile data (cell signal only)
- Check that recent seating changes are reflected in the lookup
- Have someone unfamiliar with the system test it cold — they'll find the friction points you've stopped seeing
Set Up QR Check-In in Minutes
RSVP form, seating tool, Master QR sign, and live arrival dashboard — all included with Event Pro.
Print Specifications: Getting the QR Code Right
A QR code that doesn't scan is worse than no QR code — guests try it, fail, and lose confidence in the system. These specs eliminate scanning failures.
Minimum Print Size
- QR code on a sign (Master QR): 5 x 5 inches minimum. For a venue wider than 30 feet, use 7 x 7 inches. Larger is always better.
- QR code on a printed invitation: 1.5 x 1.5 inches minimum. Test scan before printing the full run.
- QR code on a place card or table tent: 1 x 1 inch is the practical minimum, but 1.5 x 1.5 inches scans more reliably across phone models.
Resolution and Export
- Resolution: Export at 300 DPI minimum for print. The QR code PNG from your QuikRSVP dashboard is high resolution and ready for print use.
- Format: Use PNG (not JPEG) for QR codes. JPEG compression introduces artifacts that confuse phone cameras at smaller sizes.
- Quiet zone: Keep a white border of at least 4 "modules" (the small squares in the code) around all four sides. Don't let decorative elements bleed into this margin.
Sign Dimensions and Placement
- Standard easel sign: 18 x 24 inches (46 x 61 cm). Visible from 12+ feet away. This is the most common size for foam board prints at venues.
- High-traffic entrance (200+ guests): Print two signs side by side, or use a 24 x 36 inch format so guests at the back of a cluster can still see it.
- Height: Mount or place the sign so the QR code sits at approximately chest height (42-48 inches from the floor). Eye level means guests can scan without bending or stretching.
- Lighting: Avoid placing the sign where it will be backlit or in direct glare. Cameras struggle with high contrast from bright backlighting.
Color and Contrast
- Black code on white background: Maximum scan reliability. This is the safe choice.
- Dark code on light background: Works well if you want to match your event palette. Navy on cream, dark green on ivory — fine, but test it before committing to a print run.
- Avoid: Light code on dark background (many phones struggle), colored code on colored background (too much ambiguity), code overlaid on a photo or texture.
What to Print on the Sign
Sign copy template (adapt for your event):
Welcome to Sarah & Tom's Wedding
[QR CODE — 5 to 6 inches square]
Point your camera here to find your table
Can't scan? Visit quikrsvp.com/sarah-tom | Need help? Our greeter is at the welcome table
The instruction line ("Point your camera here") is not optional. A surprising number of guests — particularly those over 55 — don't know that the native phone camera reads QR codes without an app. One sentence prevents a lot of confusion.
The backup URL is equally important. Print it small but legibly below the code. Guests with older phones, non-standard camera apps, or cases that block the lens can type the URL manually and get the same result.
Design the sign in Canva, PowerPoint, or Google Slides. Drop in the QR image from your dashboard and print on foam board at a local print shop (same-day service is available at most FedEx Office, Staples, and Office Depot locations).
What Guests See When They Scan
When a guest scans the Master QR and enters their name, the check-in page should give them everything they need in one screen. Calibrate what you display based on your event type.
For Weddings
- Table number: The primary thing they need ("You're at Table 7")
- Meal choice: Confirms what they selected and helps servers identify plates at a plated dinner
- Plus-one name: "You and David are at Table 7" eliminates any ambiguity about seating
- Personal note (optional): "A highchair has been reserved at Table 7 for Lily" — useful for guests with specific accommodations
For Conferences and Corporate Events
- Badge type: Speaker, Exhibitor, VIP, General — lets registration staff hand the right badge without asking
- Session schedule: Which breakout sessions the attendee registered for, with room numbers
- Table or seat assignment: For seated dinners or gala components
- Venue WiFi: Network name and password — guests appreciate not having to find a printed card
For Fundraisers and Ticketed Events
- Table number and auction paddle number
- Ticket tier: Gold, Silver, General — routes guests to the correct seating zone
- Special access notes: VIP reception, backstage, reserved lot
Accessibility: Guests Who Can't or Won't Scan
Realistically, 5-15% of guests at any event will not use the QR code. Older guests, guests without smartphones, and guests whose phones won't cooperate need a parallel path. This is not a failure of the system — it's expected, and easy to plan for.
Option 1: Greeter with Dashboard Access
Station one person at the entrance with a phone or tablet logged into your QuikRSVP dashboard. They can search any guest by name in seconds and tell them their table verbally. This person doubles as the walk-in handler and the general problem-solver at the door. One person is enough for events up to 250 guests if arrivals are staggered.
Option 2: Printed Alphabetical Backup List
Export your guest list with table assignments on the morning of the event and print a single alphabetical copy. Keep it folded at the welcome table, not prominently displayed. Most guests will use the QR code; the list is there for the few who can't.
A single printed page handles roughly 50 guests. For 150 guests, a 3-page printout is enough. Update it if you make seating changes after 10 AM on the day of the event.
Option 3: Hybrid Sign with Typed URL
As mentioned in the sign design section: always print the short URL below the QR code. Guests who can't scan can type it into their browser and reach the same name-lookup page. This eliminates the need to approach a greeter for anyone who is comfortable with a phone but can't get the camera to scan.
Handling Walk-Ins and Unregistered Guests
Someone will show up who isn't on your list. A plus-one whose name was never provided, a last-minute invite, someone who RSVP'd "no" and changed their mind. Here's the contingency workflow:
What Happens When a Name Isn't Found
When a guest searches their name and gets no match, the check-in page shows a friendly message directing them to the greeter. The exact wording matters: "We couldn't find your name — please check with our greeter at the welcome table" is warm and specific. A bare "not found" error creates embarrassment and confusion.
Greeter Quick-Add Workflow
The greeter with dashboard access can add walk-ins directly:
- Guest approaches and gives their name
- Greeter searches the dashboard — if they're already in the system (RSVP'd "no" or listed as a plus-one under another guest), the greeter can check them in manually
- If they're a true walk-in, the greeter adds them to the guest list, assigns them to your overflow table, and marks them as "walk-in"
- Guest can now scan the Master QR and find their assignment, or the greeter tells them verbally
This takes 15-20 seconds. The key is having one designated person doing this, not improvising in the moment.
Reserve a Flex Table
For events where walk-ins are likely — fundraisers, community events, large family gatherings where people bring unannounced guests — keep one table partially unassigned as an overflow option. Label it internally (not on a sign). Walk-ins go there by default. If nobody unexpected shows up, fill those seats from the end of the night.
Connectivity and Offline Contingencies
QR check-in requires internet access for the name lookup. This is the most common concern, and here's an honest assessment of the risk and mitigation.
The Realistic Connectivity Situation
The QuikRSVP check-in page is deliberately lightweight — no heavy scripts, no large images, minimal page weight. It loads reliably on a single bar of LTE in most cases. In practice, connectivity failure is rare because guests are using their own mobile data, not the venue WiFi. Mobile networks are more reliable than venue WiFi at most locations.
High-Risk Venues
Some venues genuinely have poor connectivity: converted barns in rural areas, basement ballrooms in dense urban buildings, remote outdoor sites. For these locations:
- Personal hotspot: Bring a dedicated mobile hotspot device and position it near the entrance. Connect the greeter's tablet to it. A $30/month plan with a dedicated device eliminates the venue WiFi dependency entirely.
- Printed backup list: Export guest list with table assignments on the morning of the event. Keep it at the welcome table. If connectivity fails completely, the greeter works from the printed list.
- Pre-downloaded guest list: Open the dashboard on the greeter's tablet or phone while connected and keep the browser tab open. Many browsers keep recently-loaded pages accessible in low-signal conditions.
A two-minute prep task — printing the alphabetical backup list — eliminates the worst-case scenario entirely. Do it on the morning of the event regardless of how reliable you expect the connection to be.
QR Check-In by Event Type
Weddings
Place the Master QR sign between the ceremony exit and the reception entrance so guests check in during the natural transition. This is the moment when they're moving, their phones are already out from ceremony photos, and they have 30-60 seconds of free time before finding their seat.
For 100-150 guests with a single entrance, one sign is sufficient. For 150+ guests or a wide venue entrance, print two signs spaced 6-8 feet apart so guests don't cluster at one point.
Conferences and Summits
Send personal QR codes in the confirmation email so attendees arrive with their code ready. Registration desk staff scan the code with their phone camera — no hardware needed. For multi-session events, each breakout room entrance can have its own Master QR sign, which tracks session attendance independently.
Corporate Galas and Award Dinners
Tiered access events (VIP tables, executive lounge, general seating) work well with personal QR codes sent in advance. The code itself signals access level — a gold confirmation screen for VIP, blue for general — so ushers can route guests visually without asking questions or checking a list.
Bar/Bat Mitzvahs and Multi-Generational Events
Run the hybrid approach by default: Master QR sign for guests who prefer self-serve, plus one greeter with a tablet and a printed backup list. For this event type, the 10-20% who won't scan skews higher because of age range. Plan for it rather than treating it as an edge case.
Fundraisers and Ticketed Galas
Walk-ins and last-minute ticket purchases are common. Keep the Flex Table approach in your plan and make sure the greeter has add-guest permissions on the dashboard. Donation tier information on the check-in confirmation screen (Gold, Silver, General) allows servers and ushers to provide the correct level of hospitality automatically.
Live Arrival Tracking: What You Can See During the Event
Your dashboard updates in real time as guests check in. For a wedding coordinator or event manager, this changes how you make decisions during the event:
- Running arrival count: "94 of 152 guests checked in" — watch the percentage climb in real time
- Per-guest status: Green for checked in, grey for pending. Search any name to see their status instantly.
- Arrival time log: See exactly when each guest checked in, which helps you identify when the crowd peaks and when arrivals slow
- Table fill rate: See which tables are full and which have empty seats, useful for last-minute walk-in assignment and for timing dinner service
In practice: if 70% of guests are checked in at T-minus 10 minutes before your scheduled first dance, you know to delay by 15 minutes. If a table shows three empty seats at the time of first course service, you can decide whether to proceed or hold. Real data, real decisions. For a full event-day timeline and planning checklist, see the wedding planning checklist.
Common QR Check-In Mistakes
Mistakes That Break the Experience
- QR code too small: Under 3 inches on a sign means phone cameras struggle at standing distance. Go 5 inches minimum, 7 for large venues.
- JPEG export instead of PNG: JPEG compression degrades QR codes at small sizes. Always export as PNG.
- No test scan the day before: A broken link or wrong URL discovered the morning of the event is a crisis. Discover it 24 hours early when you can fix it.
- Single sign for 200+ guests: One sign creates exactly the bottleneck you were trying to eliminate. Print two.
- No backup plan for poor connectivity venues: If the venue is a rural barn or a basement ballroom, print the list. Always.
- No greeter for the 5-10% who can't scan: QR check-in is self-serve for 90% of guests. The other 10% need a person. Have one.
- Seating changes not synced before doors open: If you swap tables at noon and doors open at 6 PM, verify the lookup reflects the final assignments before the first guests arrive.
Cost Comparison: QR Check-In vs. Traditional Escort Cards
| Item | Paper/Traditional | QR Check-In |
|---|---|---|
| Escort cards (150 guests) | $150-$400 | $0 |
| Calligraphy or letterpress printing | $100-$300 | $0 |
| Seating chart poster | $50-$150 | $0 |
| QR welcome sign (foam board print) | N/A | $8-$20 |
| RSVP tool with QR check-in + seating | N/A | $35 one-time (Event Pro) |
| Total | $300-$850 | $43-$55 |
With QuikRSVP, QR check-in, seating management, and live arrival tracking are all included in the Event Pro tier ($35 one-time per form). There's no per-guest fee, no per-event subscription, and no hardware to rent.
Ready to Set Up QR Check-In?
Build your RSVP form, assign seating, and get your Master QR sign — all in one place. Event Pro is $35 one-time per form, no subscription.